 WorkBook
E-invoicing sends your business sales to the tax authority through Wafeq, an approved service provider. Connect your company to Wafeq once, and WorkBook sends eligible invoices for you.
Before you start.
- You need a Wafeq account with an API key, an OAuth client ID and an OAuth client secret. Use the sandbox ones to practise.
- You need the E-invoicing permission, which administrators have.
Steps.
Open Settings, then Taxes, then E-invoicing. Status shows Not connected.
Under Mode, choose Sandbox to practise or Live for real invoices.
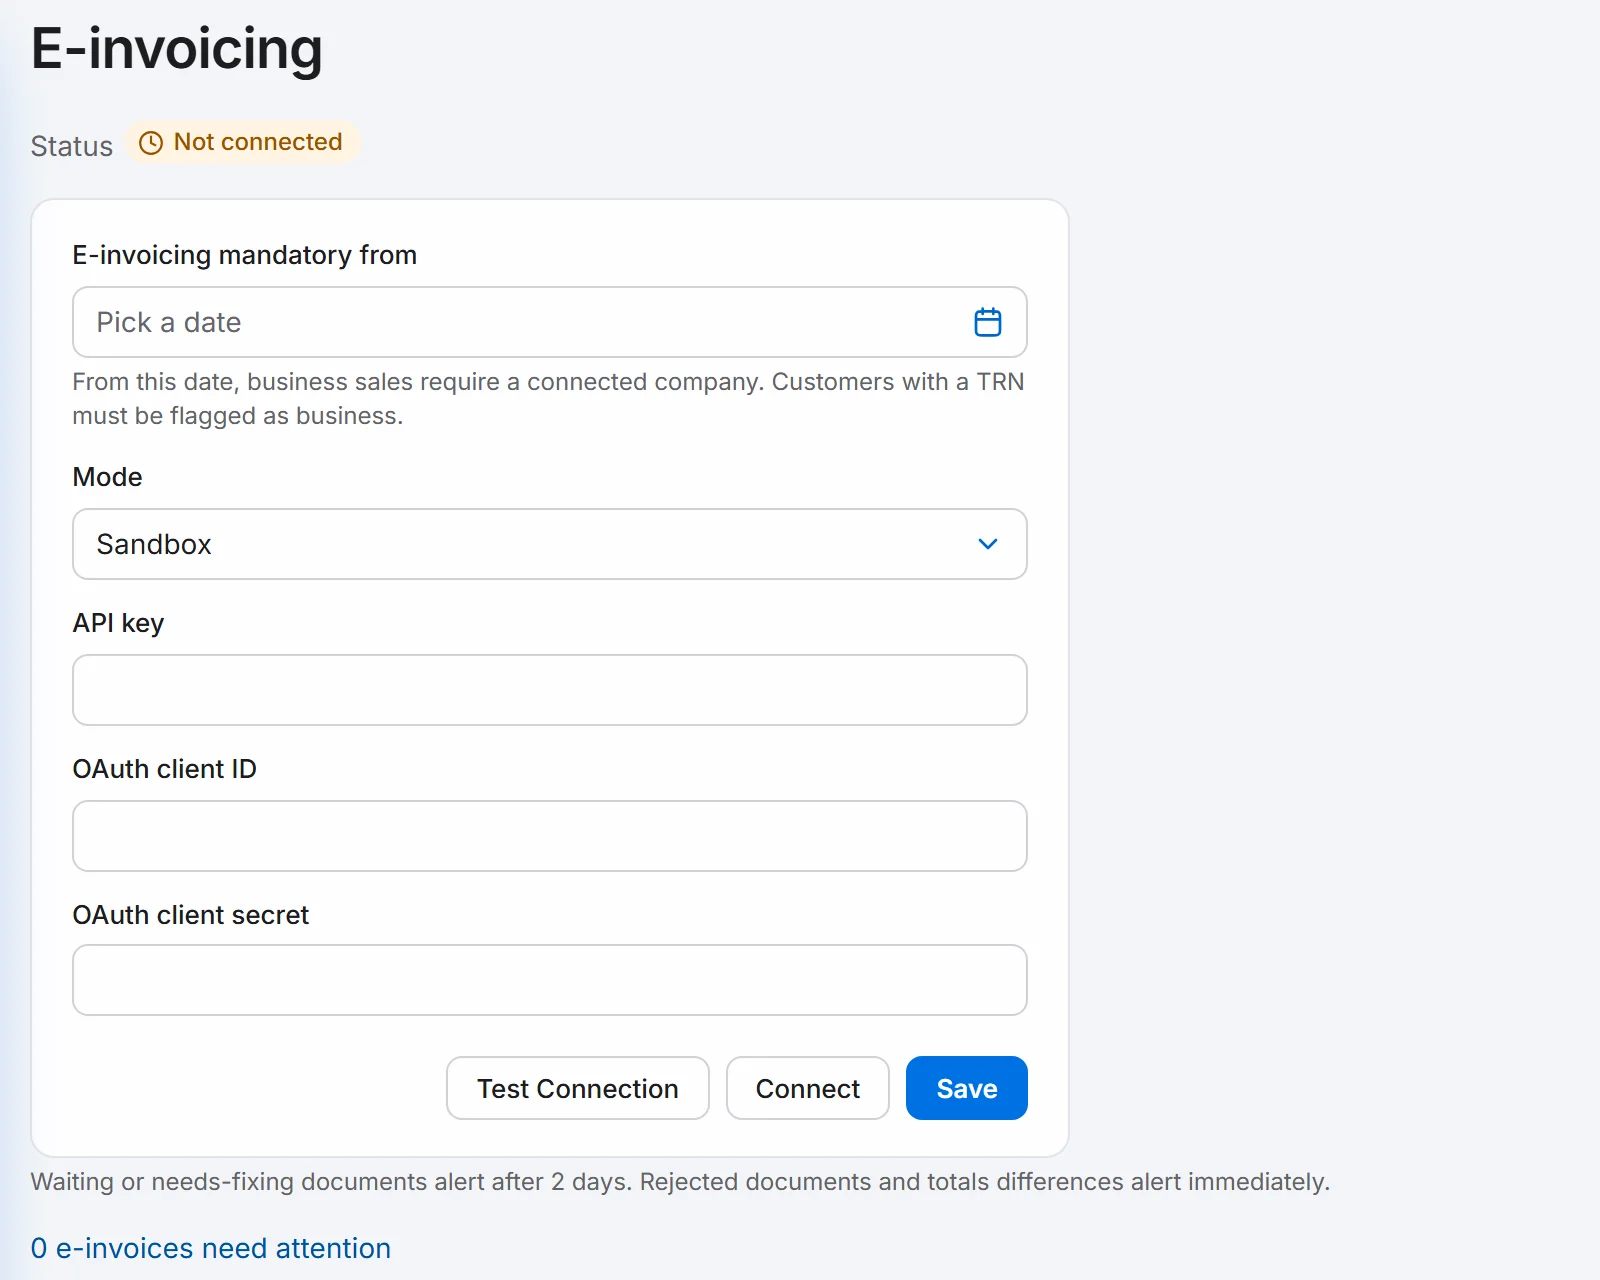
Enter the API key, OAuth client ID and OAuth client secret from Wafeq, then choose Save.
Choose Test Connection. A message says whether the key works.
Choose Connect. Wafeq opens so you can approve WorkBook. Approve every permission it asks for.
When you return to E-invoicing, Status shows Connected, with your company name and TIN.
Set E-invoicing mandatory from to the date the rules apply to you, then choose Save.
Good to know.
- Saved keys show as Set and are never shown again, so keep your own copy.
- Changing the mode disconnects the company. Sandbox and Live need separate keys and a separate Connect.
- Once the mandatory date has passed, posting a sale to a business customer needs a connected company. A customer with a TRN must be marked as a business first.
- The page shows how many e-invoices need attention. Waiting or needs-fixing ones alert after 2 days. Rejected ones alert at once.
The rules: Choosing and checking a provider.
Related.
- Issue a credit note for returned goodsOpen the invoice, choose Return or correct, then Return / Credit. Enter the quantity returned and choose Post return to issue a tax credit note.
- File your VAT 201Open Reports, then VAT Return (VAT 201), pick the period and read the boxes. You then enter the figures on EmaraTax; WorkBook does not file for you.