 WorkBook
Give each person their own login so every entry shows who made it. A role decides what they can do. A branch limit decides where.
Before you start.
- You need the Admin role.
- Add the branches first, under Settings > Branches and Locations.
Steps.
Open Settings, then Users and Roles, and choose New User.
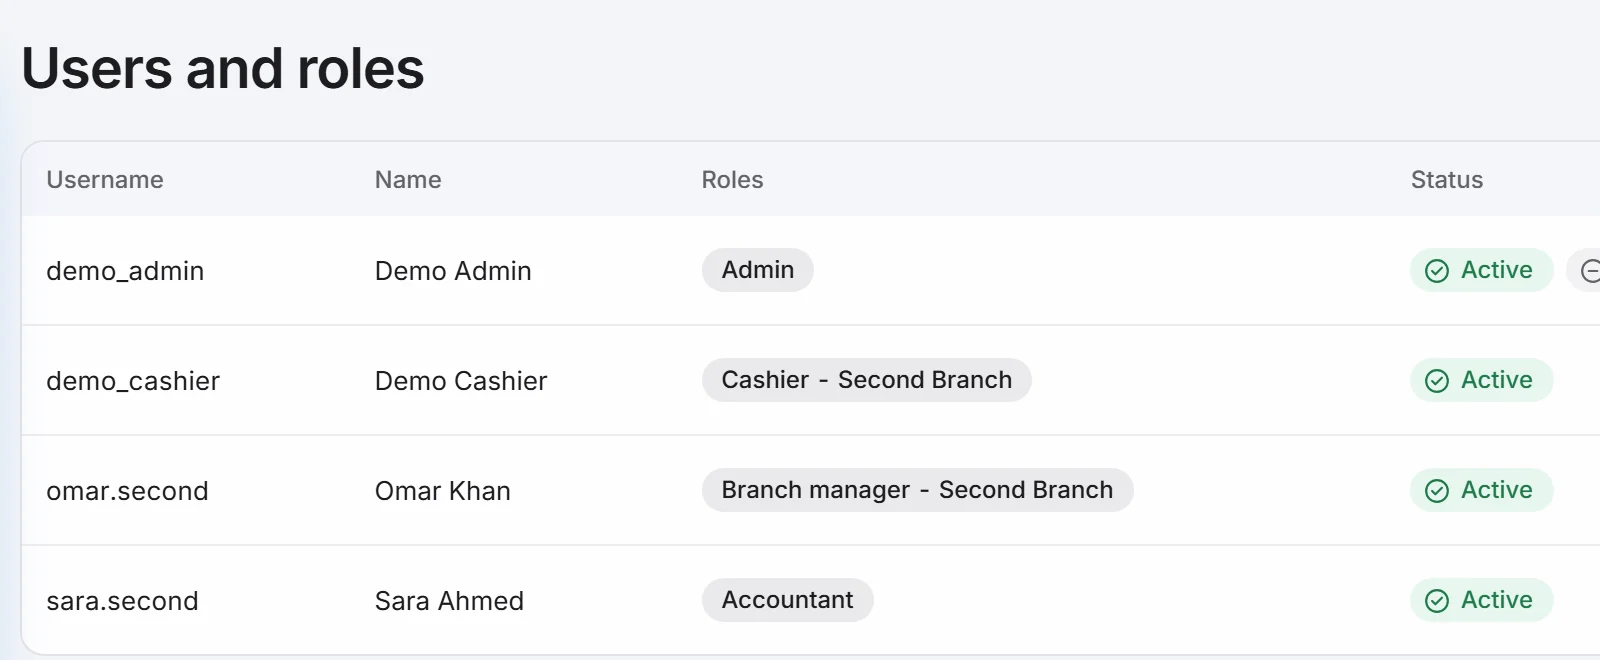
Type a Username and a Name.
Choose a Role: Admin, Accountant, Branch manager or Cashier.
To limit the person to one branch, choose it under Branch. Leave All branches for company-wide access.
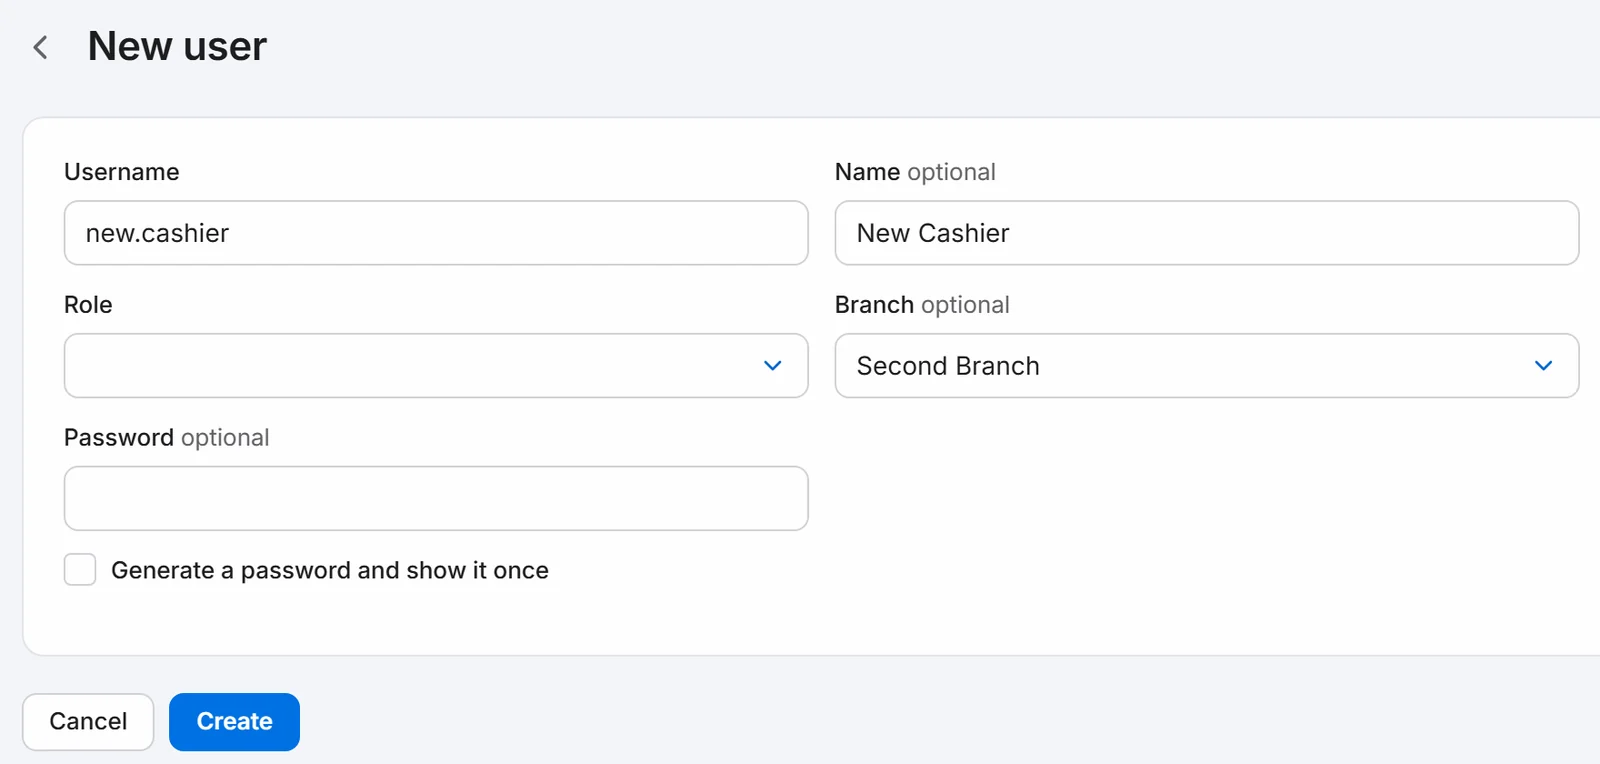
Type a Password, or tick Generate a password and show it once. Choose Create. Copy a generated password when it appears, because it is not shown again.
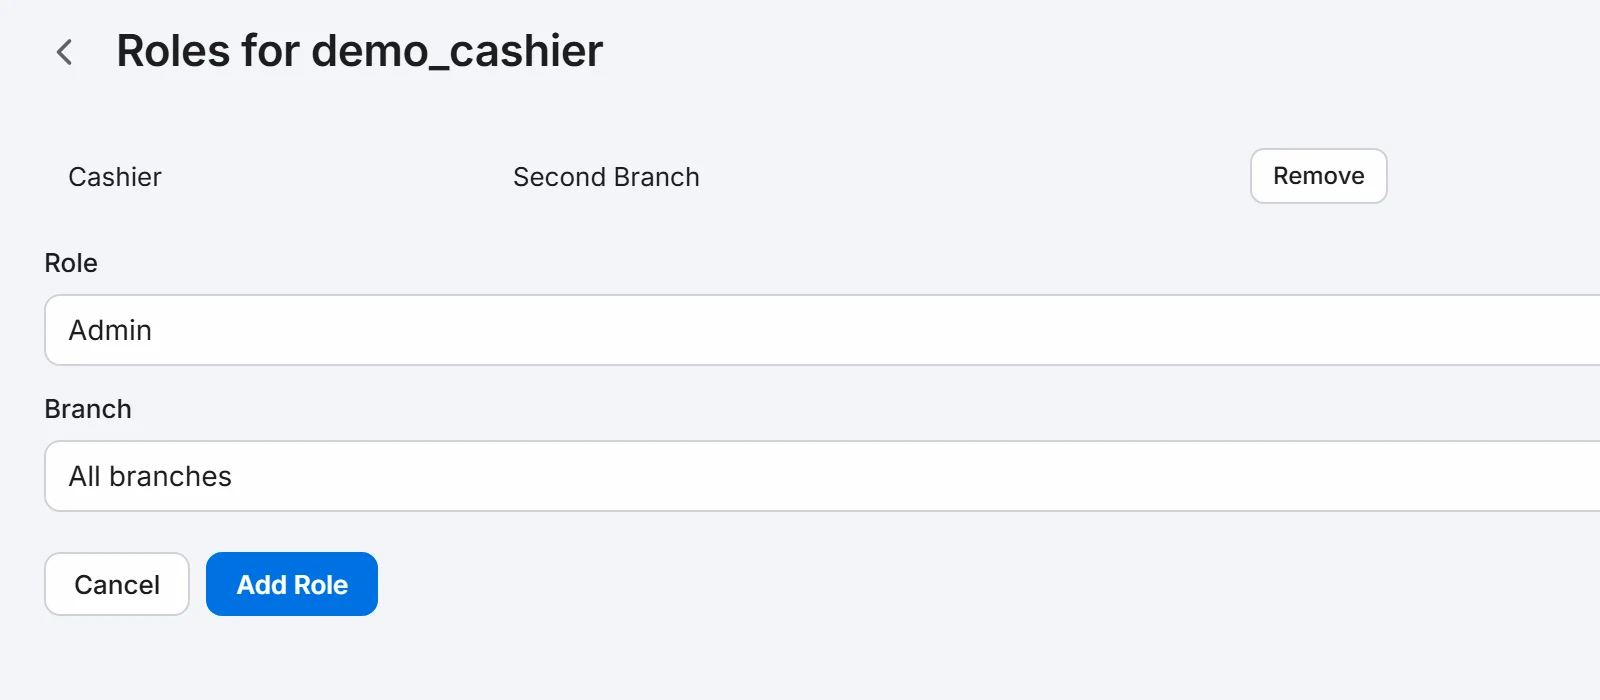
To change a person's roles later, choose the pencil on their row. Remove a role, or pick a role and branch and choose Add Role.
For a password reset, a second device or to stop someone signing in, choose the three dots on their row.
What each role can do.
- Admin: everything, including users, settings, e-invoicing and the opening import.
- Accountant: all accounting and reports, but not users, settings, e-invoicing or the opening import.
- Branch manager: sales, purchases, payments, stock transfers and adjustments, reversals, credit-limit overrides and reports.
- Cashier: sales invoices, returns, receipts, expenses and delivery notes, and adding a new customer.
Good to know.
- A role limited to a branch works only in that branch. A person can hold several roles, such as Cashier at one branch and Branch manager at another.
- By default a person stays signed in on one device. Signing in elsewhere signs the first one out. Choose Allow Several Devices in the three-dot menu to change that.
- Deactivate stops sign-in but keeps the name on past entries.
- At the till, cashiers choose their name and enter a PIN of 4 to 6 digits. Each person sets their own under Set My PIN on the Point of Sale screen.
Related.
- Set up your companyIn Settings, check your company profile, add your logo, branches and stock locations, then review your VAT codes and chart of accounts.
- Install a WorkBook server for branchesRun one command on a Debian or Ubuntu server, or ask us to do it. Then connect each PC and till to the server with a six-digit code.
- Bring in your opening balancesDownload the Excel workbook in Settings, fill in your balances, customers, suppliers, items and stock, add the file to check it, then import it once.